Knowing how to clean and sanitize your beer bottles properly is an essential piece of knowledge in every home brewer’s arsenal. Luckily, sterilizing a glass bottle and preparing it for reuse doesn’t have to be a slow or complicated process.
Here’s how to sanitize beer bottles in four simple steps:
- Soak the beer bottles.
- Wash the glass bottles and remove all the labels.
- Rinse and dry the beer bottles.
- Sanitize the bottles.
In the following sections, I’ll take you through the best approach to take for each of these steps. This knowledge will help you along your home brewing journey by making bottle cleaning and reuse the quickest and easiest part of this time-consuming process.
1. Soak the Beer Bottles
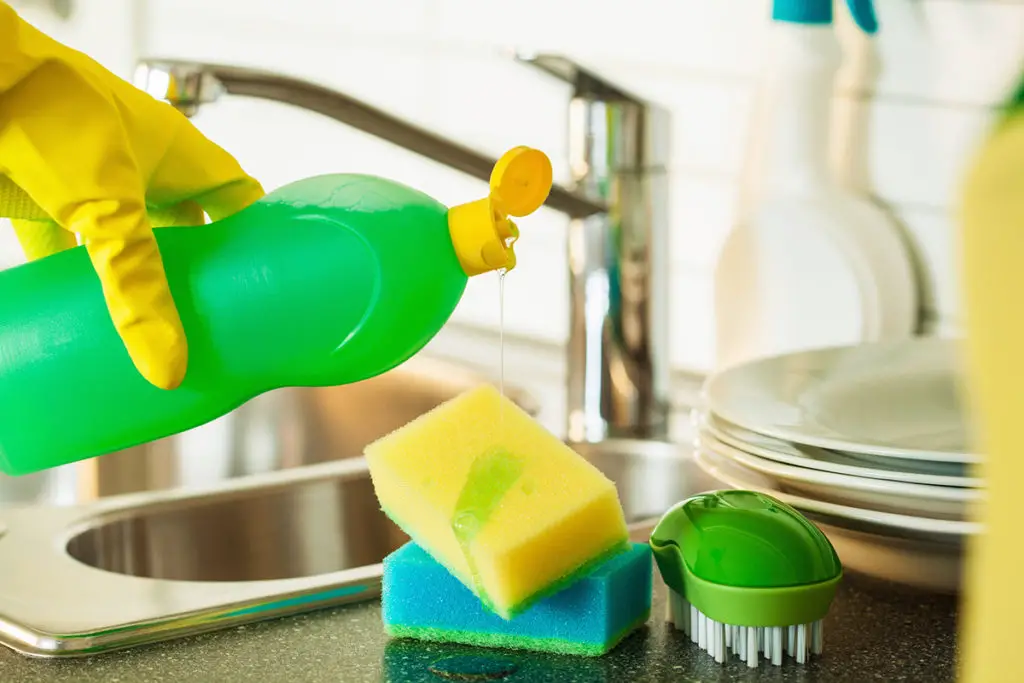
After accumulating enough bottles to store the amount of beer you plan to brew, you can start their cleaning by soaking them in a solution consisting of water and a cleaning solution such as No products found. (available on Amazon). This solution is biodegradable and will clean your bottles thoroughly.
Of course, you can also choose your preferred dish soap as an alternative.
BEER DROP: Boxes of beer from Award-winning microbreweries → Join The Club
Make sure you find a soaking container that’s big enough so that the bottles don’t get overcrowded. Their surface contact with the solution is essential in the cleaning and sanitizing process.
If you can’t get your hands on a big enough container or have a lot of bottles to prepare, you can use your bathtub or sink to achieve the same results.
Since you’ll be dealing with high-temperature waters and soap, I recommend using a pair of rubber gloves throughout this process.
You now have your vessel of choice, so start filling it up with warm water (as hot as you can handle) while adding enough of your cleaning agent to produce some suds. When the water reaches your desired level, turn off the faucet and mix the soap and water to create a homogeneous solution.
Take each bottle, fill it with the prepared solution and fully submerge it inside the water. During the process, you’ll be able to add more water and detergent if the mixture you’ve prepared doesn’t suffice.
Now that your bottles are filled and covered in the solution, it’s time to wait and let them soak. You can leave them anywhere from 15 minutes to 24 hours, but the more time you give them to absorb the detergent, the easier it’ll be to remove the beer bottle labels and thoroughly wash the bottles afterward.
2. Wash the Beer Bottles and Remove All Labels
Before starting this second step, make sure to have a bin nearby where you can throw any solid residue you’ll find during the washing, along with the discarded labels.
Using your rubber gloves, start taking out the bottles from the container and dump most of the solution out of them, ensuring to leave a small amount still inside. Then, cover the aperture of each bottle with your finger and start shaking it so the soapy solution gets in contact with every inch of the inside surface.
The bottle should be relatively sterilized (though not yet ready to reuse) and have no visible stains at this point of the process. If you can still spot marks and stains on the inside, throw that bottle away, as it’s not suitable for reuse, and continue with the next one.
Alternatively, you can scrub the inside of the bottles using a bottle brush such as this flexible No products found. (available on Amazon) to get an even more thorough cleaning and make sure to get those hard-to-reach places.
When doing so, always hold the bottle upright to make sure every last stain has been removed.
After repeating the cleaning with every container, it’s time to remove all labels and glue from the outside. At this point, most labels will start coming off on their own; all you have to do is carefully lift them using your hands and discard them.
After removing the sticker, chances are you’ll be left with some sticky residue on the glass surface.
To remove this residue, submerge the bottles again in hot soapy water and scrub off the glue. It may help to use a brand new scouring pad or sponge.
The glass should look as good as new within a minute or two. After repeating the process with all remaining bottles, you can immediately move on to the next step.
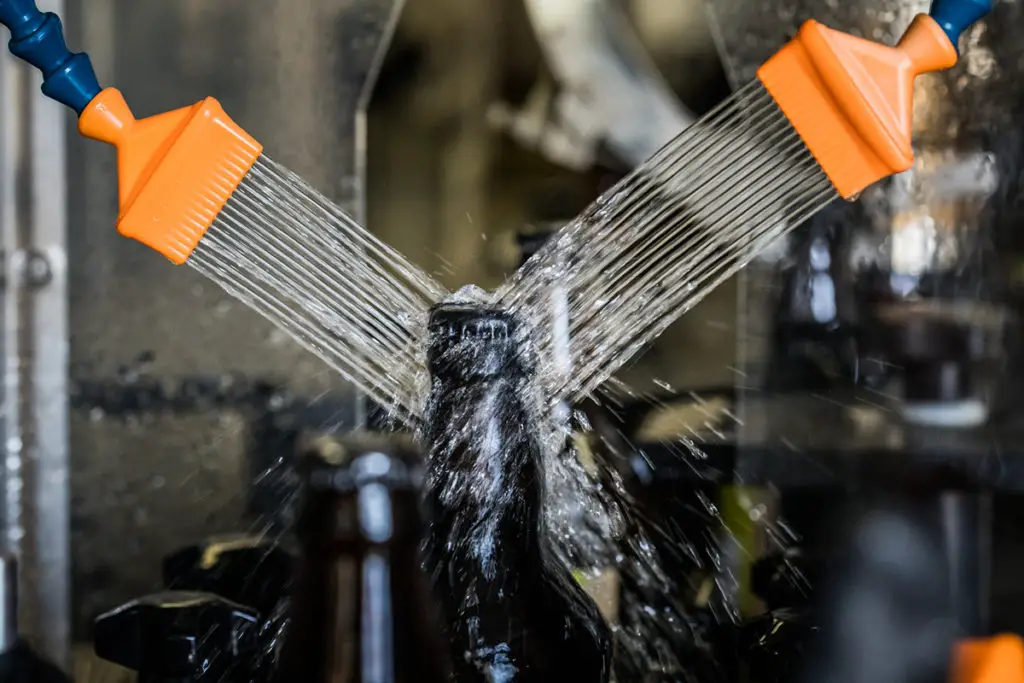
3. Rinse and Dry the Beer Bottles
When it comes to rinsing, it’s advisable to use the hottest water possible, otherwise, you may re-contaminate the bottles you’re trying to sterilize, setting you a few steps back in the process.
During this part of the process, you can choose the water temperature that would work best for you.
For example, using hot running water is an excellent way to get rid of any remaining bacteria or microbes from the bottles, which will help along the sterilization process. Having said that, when doing so, you may need to wear heat-resistant gloves; otherwise, you can severely damage or burn your skin.
When all the bottles are thoroughly rinsed, you should place them upside down on a bottle tree or No products found. (Amazon) and let them drip dry. Your dishwasher rack can be used for this process, as well.
Remember that you need to be patient and wait until the bottles have dried out on their own, as using a cloth to pat them dry can contaminate them.
4. Sanitizing the Beer Bottles
You’ve made it to the last step of the process. After sanitizing the bottles, they’ll be completely safe and ready for reuse. When it comes to this step, there are many ways to go about it, and you’re free to choose the method that works best for you.
As discussed below, there are three main approaches you can use when sanitizing your beer bottles:
Use the Dishwasher to Sanitize Your Beer Bottles
If you have a dishwasher in your home, I highly recommend choosing this method, as it’s by far the safest and most efficient approach.
To sterilize your bottles, you’ll first need to place them upside down inside the equipment. If your dishwasher isn’t big enough to fit all containers, you can separate this process into phases.
Please ensure there are no dirty dishes inside the equipment during this process, as one unnoticed dirty spoon or fork can ruin the whole process. Close the door and set the cleaning cycle on the “Sanitize” setting. While doing so, double-check to ensure that the heat cycle is on; otherwise, you won’t be able to sanitize the beer bottles properly.
You should not use any dishwasher detergent or drying agent when choosing this method; otherwise, their taste could transfer onto the glass surface. All you have to do now is wait for the dishwasher to finish its cycle. After taking out the bottles, it’s best to let them cool down for about 15 minutes before you begin bottling beer.
Consider Using the Oven to Sterilize Beer Bottles
Using the oven is a less conventional approach to sterilizing beer bottles, but it works nonetheless. Before placing the containers inside the stove, you’ll want to cover each of their tops with a small aluminum foil square. Using foil as temporary bottle caps will ensure that the bottles will remain sterile indefinitely after cooling and in storage if kept wrapped at all times.
Now that the bottles are fully covered, place them upright on your oven’s lowest shelf. Before choosing the equipment’s settings, consider how much time you have on hand. Shorter sterilization at higher temperatures is highly effective but can cause significant damage to the glass itself.
Therefore, if you have enough time and patience, I highly recommend choosing a longer timeframe combined with a lower temperature.
You don’t want to go faster than 60 minutes at 338°F (170°C), while you can run the process for as long as 12 hours at 250°F (121.11°C). A happy medium would be sterilizing your bottles at 284°F (140°C) for about 180 minutes.
This process will kill all bacteria and microorganisms and make the beer bottles suitable and safe for reuse.
After the heat sterilization has finished, you can allow the bottles to cool naturally overnight. Remember not to remove the foil cover until you intend to use the containers, as it can keep them sterile and uncontaminated indefinitely. With this step done, the bottles will be ready to use, as you won’t need any further rinsing or sanitizing.
Although glass tends to be heat-proof — and this method is generally safe to use — remember that some specific types, such as soda-lime, are more sensitive to heat and prone to thermal shock; therefore, you’ll need to heat them up and cool them down slowly and at lower temperatures.
Use Bleach or a Sanitizing Solution to Sterilize Beer Bottles
To sanitize your beer bottles using a bleach solution, follow the steps below:
- Start by filling a large container with a gallon (3.79 L) of cold water and add in a tablespoon (14.79 ml) of bleach. This is the ratio you’ll want to maintain, even if you use larger portions of each. Mix the solution until well-combined.
- Start soaking each clean bottle in the mixture and set a timer for 20 minutes.
- Take the bottles out and give them a quick rinse using very hot water. Again, avoid cooler tap water as it can contaminate your containers at the very last step of the process. Alternatively, you can use a commercial home brewing sanitizing solution like the low foaming and easy-to-use No products found. (available on Amazon.com) instead of bleach.
Now your beer bottles will be fully sanitized and safe to reuse. You can repeat these sterilization methods with the same bottles many times over, so make sure to practice and perfect these steps, as they can save you a lot of money and time during the home brewing process.
Furthermore, properly sanitizing all of your brewing equipment is the number one step to ensuring that your homebrew beer tastes good.
Final Thoughts
Cleaning and sanitizing beer bottles at home requires only a few steps, a good pair of rubber gloves, and a bit of time. You can reuse these four simple steps to make any beer bottle reusable, which is a crucial piece of knowledge for any home brewer to have.