When making homemade wine, a key step is racking. Without racking, the quality of the final wine and efficiency of the winemaking process suffer. But how do professionals rack their wine?
Here’s how to rack wine like a pro (7 Steps):
- Gather the materials.
- Sterilize everything.
- Place the fermenting wine on a raised surface.
- Insert the siphon into the fermentation vessel.
- Siphon the wine.
- Expect losses.
- Cap the new fermentation vessel.
This article will explain how to rack your homemade wine like a professional. I’ll also explain what racking is, why it’s important for the wine-making process, and when to do it.
1. Gather the Materials You’ll Need to Rack Wine
You’ll need the following materials and tools to properly rack your homemade wine. These materials are:
Two Fermentation Vessels
You’re presumably making your wine in some sort of container. Many home winemakers use carboys (large clear glass jugs); others use 5-gallon (18.93-L) buckets from Home Depot.
Carboys are probably the better choice due to glass’s resilience and chemically inert nature. The clear sides of the carboy also make it easier to see how much sediment has built up.
Whatever type of fermentation vessel you choose, you need at least one extra.
A Siphon Tube
While any flexible food-safe tubing will do, purpose-made wine siphons are available. These kits typically consist of a length of surgical tubing with a built-in filter and maybe a siphon pump.
Wine/beer siphon kits typically cost between $7 and $50.
Gold Medal Wine Club - Boutique, award-winning wines delivered monthly! → Choose Your Wines
Air Tight Lids
Fermentation is an anaerobic process done by the yeast when there’s not enough oxygen available for normal metabolic processes. Also, airborne bacteria could spoil your wine.
So your fermentation vessels must have airtight lids.
Sterilizing “Meta Solution”
To ensure the safety and quality of the finished wine, everything that comes in contact with the fermenting wine must be completely sterile. It’s best to use a “Meta solution” to sterilize all of the containers and tubing prior to racking your wine.
Meta solutions are food-safe sterilizing solutions used in winemaking.
There are two sterilizing compounds commonly used in home winemaking: potassium metabisulfite (K2S2O5) and sodium metabisulfite (Na2S2O5). Either compound should be used in a ratio of 8 teaspoons to 1 gallon of water to make sterilizing solutions. That is about 10 grams per 1 liter in sensible units.
Both are available on Amazon or at winemaking supply stores.
2. Sterilize Everything You’ll Use to Rack Your Wine
The yeast is the only microorganism you want living in your wine during fermentation. Anything else can either ruin the quality of your wine or potentially toxify it.
You’ll need to mix a sterilizing solution using either potassium metabisulfite or sodium metabisulfite. Remember, both require a ratio of 8 teaspoons per 1 gallon of water.
You must thoroughly clean the secondary fermentation vessel and siphon tube with your sterilizing solution before you begin.
3. Place the Fermenting Wine on a Raised Surface
Siphons exploit a trick of gravity and viscosity. As long as the destination of a fluid flow is lower than the origin, fluid can travel surprising distances on its way and can even move upwards.
To create the siphon, the original/primary fermentation vessel must be placed on a higher surface than the destination/secondary vessel. A shelf between 2 and 3 feet (0.61 and 0.91 m) above the floor should be sufficient.
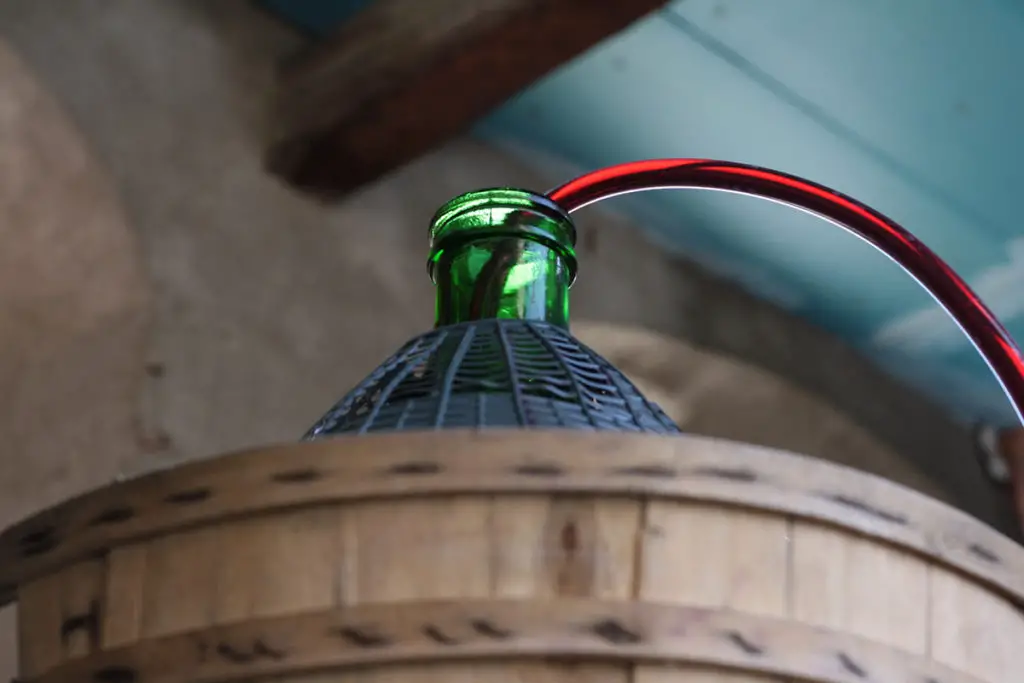
4. Insert the Siphon Into the Fermentation Vessel
Siphoning your homemade wine won’t work if the siphon isn’t immersed in the wine.
You want to position the top/filtered end of the siphon tube just above the level of the accumulated sediment; otherwise, some of the sediment could be pulled up with the wine.
5. Siphon the Wine From One Vessel to Another
Starting the siphon is very simple. All you need is your mouth!
With the top end of the siphon just above the accumulated sediment, kneel down below the fermentation vessel and start sucking on the other end of the tube. You’ll need to suck the wine through at least half of the siphon tube before it will start to flow on its own.
Try not to get a mouthful (or do if you want to sample a bit of the vino before it’s ready).
Once the wine is flowing through the siphon, insert the end you were sucking on into your secondary fermentation vessel.
Watch the fluid level in both fermentation vessels as your wine flows from one vessel to the other. If sediment starts to be sucked up the siphon or the fluid level in the secondary fermentation vessel gets full, clamp the tube with your fingers and cap the vessel.
6. Expect Losses
Like it or not, you’ll lose some wine while racking. You’ll probably get a mouth full of wine the first few times you rack wine and will probably spill some while inserting the siphon into the secondary vessel.
Some wine will also be left behind in the primary vessel with the sediment.
You can reduce losses by using a siphon tube with a built-in filter. Losses can be reduced even more by using a pump such as the No products found. (available on Amazon.com). This auto-siphon is perfect for small batches and it comes with a tubing and siphon clip.
7. Cap the New Fermentation Vessel
When it comes to making alcohol, the air is bad! When your wine is in the secondary fermentation vessel, cap the vessel with an airtight lid right away.
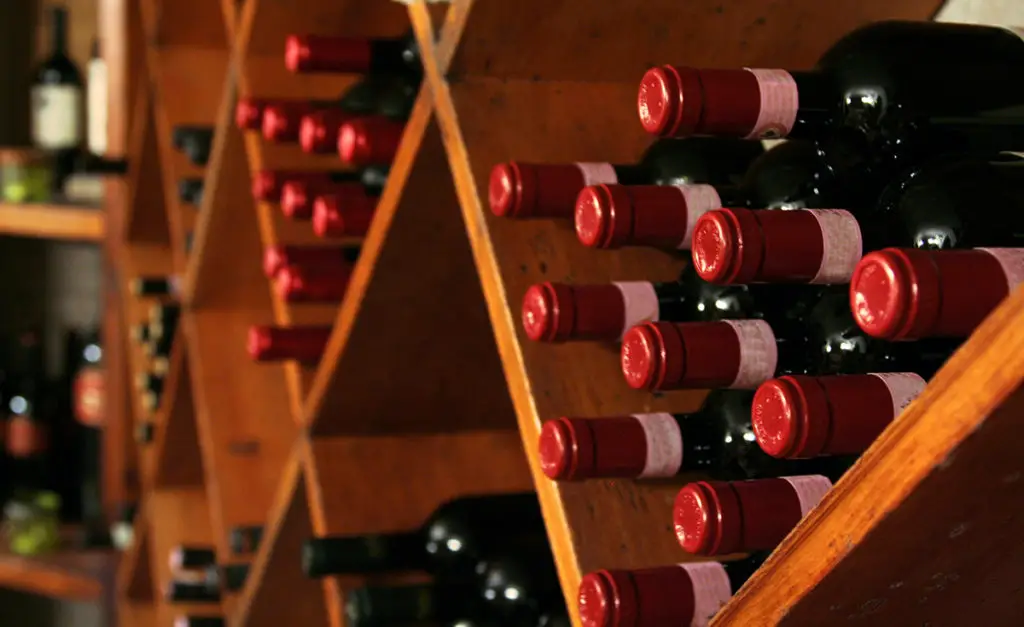
Your racked wine will continue the aging process and will most likely need to be racked a few times before you bottle it.
What Is Wine Racking?
During red wine fermentation, a lot of debris builds up in the fermentation vessel. The debris is made of grape skins, seeds, dead yeast cells, and other sediments that wind up in the fermentation vessel. Racking is used to remove the sediment from the wine.
Racking is the process of moving fermenting wine from one fermentation or aging vessel to another to leave the sediment collecting at the bottom behind.
It’s a step you’ll need to perform multiple times prior to bottling the wine. If you don’t rack your wine, the sediment will eventually cause your wine to begin to develop some unusual and undesirable flavors.
The modern process was originally developed in Burgundy, France, in the 1600s, although it has likely existed in some form since humans first invented wine and beer over 8000 years ago.
Modern small-scale racking is performed through the use of siphons. A siphon is a tube used to move fluid from one container to a container placed on a lower surface. As long as the second container is lower than the fluid level in the first, the fluid can be drawn over the rim of a tall container.
Why Is Racking Important?
There are two reasons for racking wine. The simpler reason is the suspended sediment in the wine ruins its clarity and mouthfeel. Removing the sediment improves the final quality of the wine.
The more complicated reason is to protect the wine from yeast. As the yeast living in the fermenting wine depletes the dissolved sugar near the end of the fermentation process, it eventually resorts to a metabolic process called autolysis. Autolysis is essentially microscopic cannibalism.
Yeast cells perform autolysis by secreting enzymes that break down the cell membranes of other yeast cells. These enzymes build up over a few weeks and give the wine a bitter rubbery taste.
To prevent this, dormant yeast cells which collect at the bottom of fermentation vessels must be removed.
When Should Wine Be Racked?
Many amateur winemakers rack their wine on set schedules, every few weeks then months until their wine is ready to bottle or consume. Professionals let their wine tell them when is the right time to rack it. Here’s a YouTube video on how to do it:
The wine sediment doesn’t build up at a predictable rate, so professional small-scale winemakers use the amount of sediment collected at the bottom of their fermentation and aging vessels to decide the appropriate times for racking.
The first racking should be performed between five to seven days into the fermentation process. This is primarily to remove the fruit pulp, which will begin to rot. Subsequent rackings should be done when the depth of accumulated sediment reaches approximately ½ in (12.7 mm). Another common measure is “one finger’s width.”
Homemade wine should be racked two to five times; sources differ on the exact number.
Excessive racking increases the odds of contamination from ambient microorganisms and flavor ruining oxidation. Determining how many rackings to perform requires trial and error.
Conclusion
Racking your wine is essential for producing high-quality wine. It takes some practice to get good, but you can reduce the learning curve by following the steps stated in this article.